How to Build Desktop Apps with Tauri and PHP
Tauri is an exciting alternative to Electron for building cross-platform desktop applications. While not as mature as Electron and still missing some features, it offers a fresh approach via its lightweight bundle sizes and superior performance.
These improvements are partly facilitated by the Rust back-end, but on the flip side you might have to write Rust code at some point. From my point of view the advantage here lies with Electron since it's built on Node/JavaScript which I'm a lot more familiar with.
Tauri does have enough cool features (and promises of things to come) to draw me in. The documentation is pretty good too. The best thing is that I was able to quickly scaffold a new project with a Vite + Svelte preset, then pull in Tailwind CSS without a hitch. With Electron this would have taken me a lot longer.
The need for PHP
Desktop apps very often need to do more things than the front-end code can. Things like accessing system APIs such as the filesystem, a database, or making HTTP requests.
The last one is the basis of a new idea I had for a desktop app. It required an HTTP client, and to my embarrassment I failed to build a simple one in Rust in 2 hours despite GitHub Copilot helping me (or perhaps because of it).
The question that comes to mind is, why didn't I take the time to learn Rust? Well, friend, one does not simply learn Rust in a couple of hours. Rust's paradigm is foreign enough to a PHP and JS user that it would require a longer period of deep study - time that I don't have right now. Don't get me wrong, Rust is at the top of my list of future things to learn, but currently I have other priorities.
Playing around with very basic Rust inside Tauri I quickly realized that I can call system commands from my app. The Svelte front-end can call Rust functions and pass arguments to them. The Rust function can, in turn, call a system command and pass it those arguments.
Following the thought process, I figured that I could just as well use Rust to call a PHP executable in the form of a PHAR. So I could build my HTTP client in PHP, package it into a PHAR file which I would then bundle with the Tauri app and boom, mission accomplished!
Hold your horses, this is an imperfect solution. I'll get into the weeds of how all this works but feel free to skip to the end if you want to hear the drawbacks.
The architecture
Next I'll explain the basic concept for 2-way communication between Tauri and a PHP app via serialized JSON data.
As I mentioned previously, the front-end can call Rust functions with arguments. Taken directly from the Tauri docs:
invoke('my_custom_command', {invokeMessage: 'Hello!'})
The Rust function then calls a .phar command and forwards the arguments.
The .phar code accepts the command, parses the argument, does whatever logic it needs, then returns a
serialized/stringified JSON object back to the Rust function.
Finally, the Rust function returns the string to the front-end code that issued the command.
To retrieve the response on the front-end, chain a .then to the invoke command like so:
invoke('my_custom_command', {invokeMessage: 'Hello!'})
    .then((result: string) => {
        const jsonResult = JSON.parse(result)
    })
And now we're back in familiar territory, so we are free to do whatever we want with the response object.
Building the PHAR
I haven't worked a lot with PHP executables in the past (apart from consuming them) so I wasn't in the mood to build one from scratch. Thankfully there's an excellent and powerful package named Box that can automate the build process.
On the Mac I used
the Homebrew installation, so I can run
it from anywhere in the command line with box.
To compile a PHP project simply navigate to the project at the command line and run box compile. It will generate a
PHAR binary named the same as the entry point script. So if your app's entry point is index.php the binary will
be index.phar.
The beauty of Box is that it can compile anything with zero config (though you can certainly tweak the configuration in great detail), from a simple 1-file PHP script to a full-blown Laravel app.
My advice, though, is to stick to the basics if you don't need the full power of a framework since it will have an impact on the file size of the PHAR.
Options for building PHP command line (CLI) apps
There are 3 methods that I recommend:
Plain PHP with Composer. Use
composer initand follow the prompts to quickly scaffold a new project structure. Pull in as few dependencies as you can get away with (ideally none) and rejoice in the tiny bundle size.Symfony console component. If you're a Symfony dev this is an excellent choice, especially since Symfony components are a solid backbone for a lot of other frameworks including Laravel. Unfortunately I have zero experience here so there's not much I can say.
Laravel Zero - a powerful Laravel-based CLI framework by Nuno Maduro, Laravel core team member. This one's very powerful, and has excellent documentation. It would be my go-to if I wanted to build something more complex than option #1. Furthermore, Laravel Zero includes Box by default so you don't need to install it separately.
Create the PHP back-end application
To keep it simple, I'll create a basic PHP project which takes a string argument when invoked, and responds with a JSON encoded string.
mkdir php-example && cd php-example
composer init
This scaffolds an fresh project with a composer.json that looks like this (I changed the default generated namespace):
{
  "name": "breadthe/php-example",
  "description": "Example app that accepts a string argument and returns JSON encoded data",
  "type": "project",
  "license": "MIT",
  "autoload": {
    "psr-4": {
      "App\\": "src/"
    }
  },
  "require": {}
}
Run composer install.
Finally, create a index.php file in the root of the project as the entry-point script with the following:
<?php
require __DIR__ . '/vendor/autoload.php';

// Get the first argument
$argument = $argv[1] ?? null;

if (empty($argument)) {
    echo json_encode([
        'error' => true,
        'message' => 'Argument expected',
    ]);

    return;
}

echo json_encode([
    'error' => false,
    'message' => "PHP says hi and thanks for the message [$argument]",
]);

return;
That's it on the PHP side. Now, this is the simplest example I could think of. If you want to pass more than one
argument you could use $argc to count the total arguments, then loop through them. Complex logic, additional classes,
services, etc. would then go into src/.
Create the PHAR
Assuming you have installed Box globally on your system, all you need to do is
run box compile inside the project folder.
The result is a index.phar file that you can execute with ./index.phar some_argument. It will
output {"error":false,"message":"PHP says hi and thanks for the message [some_argument]"}, or {"error":true,"message":"Argument expected"} if you don't specify
an argument. Later, Rust will run this file and capture the output.
Create the Tauri app
First install the prerequisites which include Rust and a bunch of dependencies.
Also install the Tauri CLI:
# either
npm install --save-dev @tauri-apps/cli

# or
cargo install tauri-cli
Create the front-end
I prefer Vite + Svelte:
npm create vite@latest

#✔ Project name: … tauri-vite-php
#✔ Select a framework: › svelte
#✔ Select a variant: › svelte-ts

npm install
If using Svelte, update the vite.config.ts file like so (the Tauri docs omit the Svelte plugin):
import {defineConfig} from 'vite'
import {svelte} from '@sveltejs/vite-plugin-svelte'

// https://vitejs.dev/config/
export default defineConfig({
    plugins: [svelte()],
    // prevent vite from obscuring rust errors
    clearScreen: false,
    // Tauri expects a fixed port, fail if that port is not available
    server: {
        strictPort: true,
    },
    // to make use of `TAURI_PLATFORM`, `TAURI_ARCH`, `TAURI_FAMILY`,
    // `TAURI_PLATFORM_VERSION`, `TAURI_PLATFORM_TYPE` and `TAURI_DEBUG`
    // env variables
    envPrefix: ['VITE_', 'TAURI_'],
    build: {
        // Tauri supports es2021
        target: ['es2021', 'chrome100', 'safari13'],
        // don't minify for debug builds
        minify: !process.env.TAURI_DEBUG ? 'esbuild' : false,
        // produce sourcemaps for debug builds
        sourcemap: !!process.env.TAURI_DEBUG,
    },
})
Create the Rust project
Inside the Vite project folder scaffold the Tauri/Rust part of the project with the following options:
# either
npm tauri init

# or
cargo tauri init

#✔ What is your app name? · tauri-vite-php
#✔ What should the window title be? · tauri-vite-php
#✔ Where are your web assets (HTML/CSS/JS) located, relative to the "<current dir>/src-tauri/tauri.conf.json" file that will be created? · ../dist
#✔ What is the url of your dev server? · http://localhost:5173
In src-tauri/tauri.conf.json update the build block to:
{
  "build": {
    // this command will execute when you run `tauri build`
    "beforeBuildCommand": "npm run build",
    // this command will execute when you run `tauri dev`
    "beforeDevCommand": "npm run dev",
    "devPath": "http://localhost:5173",
    "distDir": "../dist"
  },
Also update the build identifier from the default com.tauri.dev to a unique reverse-domain string:
{
  ...,
  "tauri": {
    ...
    "bundle": {
      ...
      "identifier": "com.tauri-vite-php.dev",
To run Rust commands from JavaScript an additional dependency is required:
npm install @tauri-apps/api
Run the app in dev mode:
# either
npm run tauri dev

# or
cargo tauri dev
To build for production use npm run tauri build or cargo tauri dev.
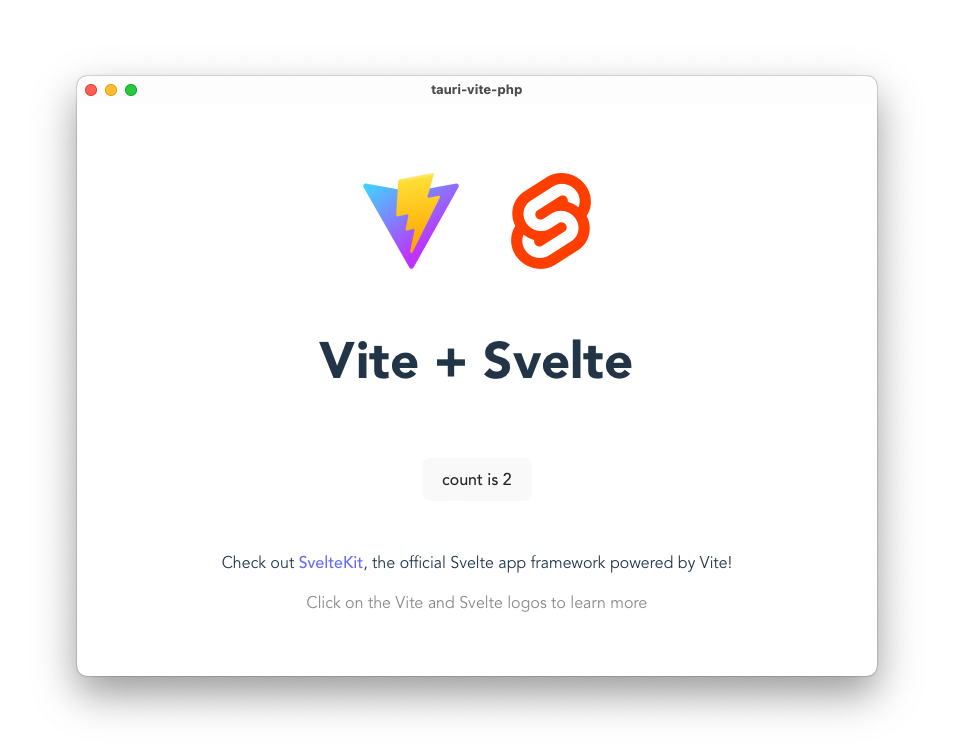
If everything went well this is how the new app looks:
Passing data from the front-end to Rust
In App.svelte (or whatever file is the main entry-point to your front-end) I replaced the generated HTML with:
<button on:click={sayHiToRust}>Say hi to Rust</button>
In the JS section:
import {invoke} from "@tauri-apps/api/tauri";

let rustResponse: string = "";

function sayHiToRust() {
    invoke("say_hi", {name: "Rust"}).then(
        (response) => (rustResponse = response)
    );
}
Next we're adding the Rust function that will handle the front-end request. In src-tauri/src/main.rs:
tauri::Builder::default()
     .invoke_handler(tauri::generate_handler![say_hi])
     ...

#[tauri::command]
fn say_hi(name: String) {
    println!("Hello {} from JS!🥳", name);
}
Looking at the dev console we should see Hello Rust from js!🥳.
Passing data from the front-end to Rust
Now that we can pass data to Rust, let's get data back from it.
We'll extend the Rust function a bit to return a string:
#[tauri::command]
fn say_hi(name: String) -> String {
    println!("Hello {} from JS!🥳", name);

    let output = "Hi back from Rust".to_string();

    output
}
Back in App.svelte add to the HTML:
{#if rustResponse}
 <div>Rust response:</div>
 <div>{rustResponse}</div>
{/if}
Clicking the button will now display Rust response: Hi back from Rust.
So now we have 2-way communication between the front-end and Rust.
I went ahead and improved this a bit by adding a text field where you can type a message that will be sent to Rust. If you type "bla bla" Rust console will now say JS says: bla bla. I won't show the changes here but you can inspect them in the repository for the complete code.
Putting it all together
Now let's wire up PHP to Rust, and start by copying the index.phar created earlier to src-tauri.
Back in src-tauri/src/main.rs (accounting for the changes mentioned at the end of the previous section):
#[tauri::command]
fn say_hi(message: String) -> String {
    println!("JS says: {}", message);

    // execute the index.phar binary
    let output = std::process::Command::new("./index.phar")
        .arg(message)
        .output()
        .expect("failed to execute index.phar");

    // convert the output to a string
    let output = String::from_utf8(output.stdout).expect("failed to convert PHP output to string");

    output
}
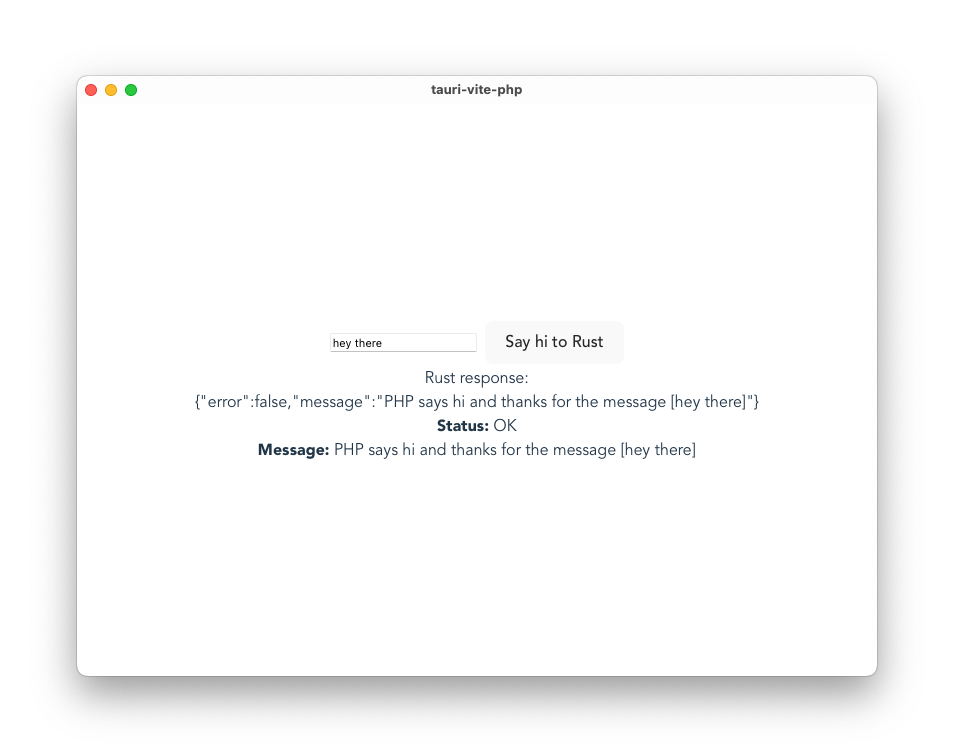
Basically we're using Rust to execute a command and pass it an argument which is the message from the front-end. We then assign the output of the command (in this case a JSON string) to the output variable and returning it to the front-end which now displays Rust response: {"error":false,"message":"PHP says hi and thanks for the message [hey]"}.
Back in JS we can use JSON.parse to transform the PHP response back to a JSON object.
Here's what the final demo looks like after I added a few more bits and pieces (ignore the lack of styling):
You can find the Tauri repo here and the PHP repo here. Note the Tauri repo already contains index.phar but feel free to rebuild it if you want.
Drawbacks
While there was a very positive reaction when I tweeted about this technique, it's not all roses and butterflies. Here are some of the drawbacks.
- 🧪 Experimental for now. I'm not yet sure how viable this approach is. The reason I went in this direction is that I don't yet know enough Rust, but I'm hoping to change that. When that happens, I won't have need for PHP.
- 🤔 I'm 99% certain that PHP needs to be installed on the system running the app. I haven't built PHARs previously so despite being able to run the executable with
./index.pharI still have a feeling that PHP is required. I haven't found much online to confirm or deny this. I don't have a dev machine without PHP to test this on either. - 🚧 Problems with the prod build. Currently, when launching the production app and clicking the button to pass the request to Rust and PHP, the app crashes. I pretty sure it's a result of the Tauri build config not referencing
index.pharas a dependency. I hope to figure that out soon, since it's critical for what I'm planning to build. - 🏋️It adds overhead. With a simple PHP script as shown here the response is instant, but I can see how a larger PHP app might slow things down a little. But I wouldn't worry too much since PHP is very fast these days.
Conclusion
I'll admit that I'm quite enjoying this experiment. It may not lead anywhere, but it's still a valuable example of thinking outside the box. The issues I encountered might even push me sooner to learn some Rust.
I can see this technique being especially useful for building desktop tools for PHP developers. In this scenario the requirement for the PHP runtime might not be a deal-breaker.
I hope you enjoyed this guide and let me know on Twitter what you think.