Getting Started with Cloudinary

Cloudinary is a cloud hosted, managed CDN (Content Delivery Network) that I've been meaning to try for a long time but never got the chance, since I'm always playing catch-up with all the projects that I'm involved in.
The cool thing about Cloudinary is that you only need to upload one version of an image (or video), typically in the largest and best quality possible, and it will handle all the resizing and compression for you, on the fly. They also offer a very generous free tier that is perfect for smaller projects.
Recently I launched a one-page static site to promote a new app I'm working on, SVGX.app. The site is hosted on Netlify and so are the images.
Dealing with static images - manually - is pretty annoying to me. For the first iteration of this site I decided to save all images as JPGs to take advantage of the compression. I also made specific sizes to avoid loading full-size images.
The problem, however, is that my best attempts at doing this pale in comparison to what a specialized tool can do. Worse, Chrome's Lighthouse audits complained about the inefficient way I served images. Additionally, it's hard to maintain different sizes and formats of the same image.
So I decided to roll up my sleeves and move those images to Cloudinary in the hope that it will improve the performance of the site. I wasn't wrong.
My Lighthouse scores went up from this:

To this:
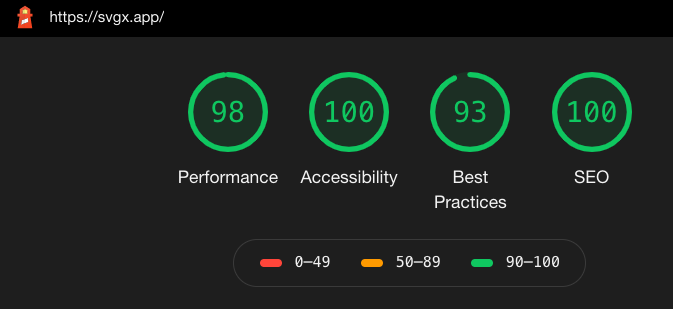
To be clear, for the handful of images I'm working with, it made the most sense to upload and link them manually, and I didn't employ any of Cloudinary's automation tools or the API.
Saving the original images
When working with Cloudinary, it is a good practice to upload the original images at the best possible resolution, in a lossless format such as PNG. This means that on your local machine you only need to store the master copy in the highest quality available.
Uploading to Cloudinary
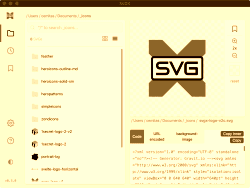
Once you've signed up for an account and logged in, you can go to Media Library and hit the big Upload button to select the images you want. You may also organize your images into sub-folders if you wish, though I opted out of that.
Real-time transformations
In Cloudinary there's a Transformations menu that I wasted time in, but it turns out I didn't need to create any specific transformations beforehand. Those are mostly for automation, which I didn't require since I did all the linking manually.
All I had to do was to get the link for an image (the 🔗 icon when you hover over an image), and then apply the transformation parameters directly to the URL in my code.
The basic URL for the main (and largest) image on SVGX.app is given by Cloudinary as:
https://res.cloudinary.com/svgxapp/image/upload/v1588298610/svgx-app_tnkpa3.png
This will get the image in its original format. In my code, however, I've applied a few transformations in order to serve a more efficient version:
https://res.cloudinary.com/svgxapp/image/upload/f_auto,q_auto:good,w_600/v1588298610/svgx-app_tnkpa3

The anatomy of a Cloudinary URL
svgxapprefers to the account that the image belongs to. Officially this is called the "Cloudinary cloud name".v1588298610seems to be a "folder" identifier, i.e all the images in the same folder share the same identifier. However, there's also an actual folder hierarchy as well, for example this imagehttps://res.cloudinary.com/svgxapp/image/upload/v1588298149/samples/sample.jpgresides in thesamplesfolder.- Finally, there's the actual file name
svgx-app_tnkpa3.png. Note that the original name of the image issvgx-app.png, but Cloudinary adds a random string at the end_tnkpa3. - The eagle-eyed might notice that my example containing the transformations is missing the file extension at the end:
svgx-app_tnkpa3. The simple reason for that is the auto format that I will discuss in more detail below.
Explaining the transformations
Transformations can be added after the upload/ section of the URL. I've only used a tiny fraction of the available ones here, but you can read about them in more detail in the official docs. For my needs, these are more than enough.
f_automeans "fetch format auto", and it allows me to leave out the file extension. This transformation tells Cloudinary to serve the most efficient image format supported by the client's browser. Ideally, this would be.webp. More details here.q_auto:goodworks withf_autoto an extent, although I haven't dived too deep into that. Suffice to say that these two transformations, in concert, will ensure the browser receives the absolute best quality of the image in an ideal format.w_600constrains the image to a maximum width of 600px while preserving proportions. For the image I linked above, this results in a 600px width and 450px height, starting from a 1600x1200 original.
How it works under the hood
When an image is served with a new set of URL transformations, Cloudinary will generate a new version of the master image and apply those transformations to it. The new version will persist alongside the master. If you pay attention you'll notice that an image with a fresh URL transformation (that was never requested before) will take a second or so to load the first time, but going forward it will load practically instantly. Pretty neat!
Examples
First, check out the hero image for this article, as well as the thumbnail in the blog index. The URLs that generate them are:
<!-- hero -->
https://res.cloudinary.com/svgxapp/image/upload/f_auto,q_auto:good,e_vectorize,w_848/sample
<!-- thumbnail -->
https://res.cloudinary.com/svgxapp/image/upload/f_auto,q_auto:good,e_vectorize,w_343/sample
Thumbnail - 100px wide:
https://res.cloudinary.com/svgxapp/image/upload/f_auto,q_auto:good,w_100/v1588298610/svgx-app_tnkpa3

Thumbnail - 100px tall:
https://res.cloudinary.com/svgxapp/image/upload/f_auto,q_auto:good,h_100/v1588298610/svgx-app_tnkpa3

Thumbnail - 250px wide with a sepia filter:
https://res.cloudinary.com/svgxapp/image/upload/f_auto,q_auto:good,w_250,e_sepia:80/v1588298610/svgx-app_tnkpa3
There are numerous ways you can manipulate images through the Cloudinary URL transformations that are outside the scope of this article, so I will end it here. The takeaway is that, depending on your use case, you might get a big performance boost should you decide to host your static images and videos with a service like Cloudinary. More importantly, it removes most of the friction in having to deal with multiple image sizes, resolutions and so on.
Full disclosure: Cloudinary did NOT sponsor this article.