How to Deploy Svelte to Netlify
In this guide I'm going to explain how to deploy a static Svelte site to Netlify. Let's get started.
The goal of this exercise is to deploy a simple Todo app from GitHub to Netlify.
First, create a free account with Netlify. When you log in you should see your dashboard which shows your sites:
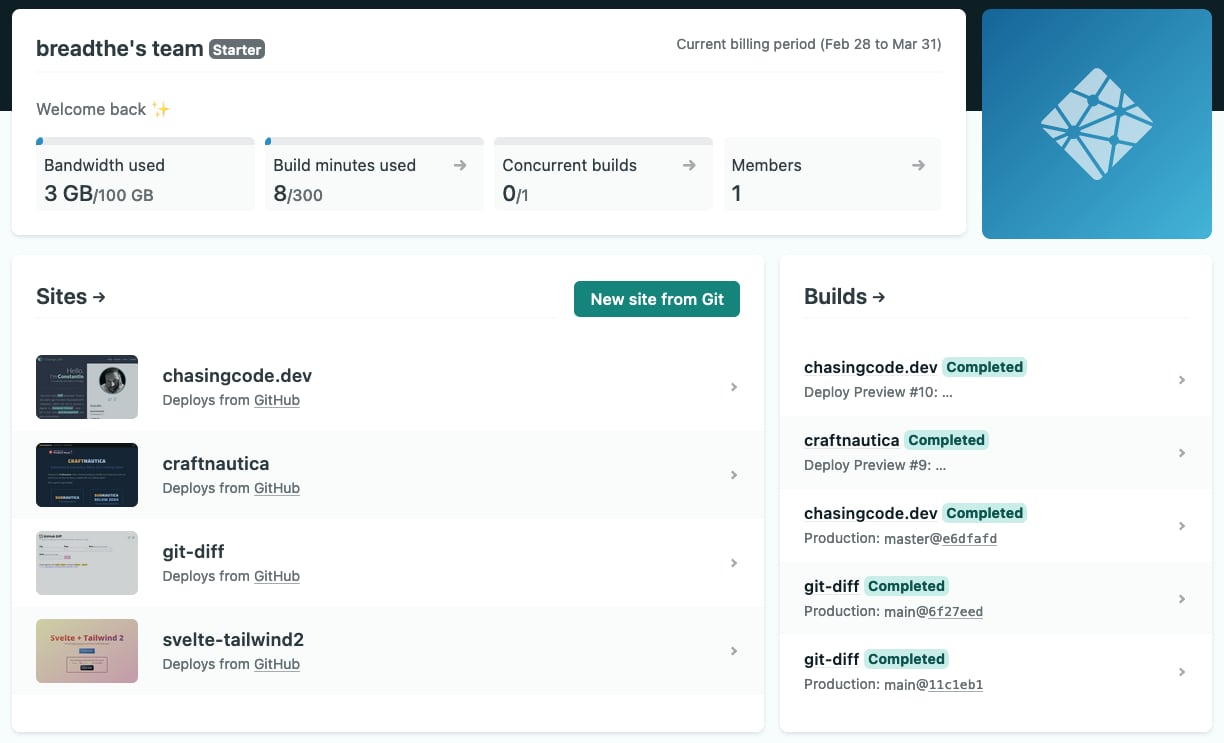
I have 4 sites currently (including this blog), all deployed from GitHub. Except for the blog, which uses a custom domain, the 3 remaining sites use Netlify's netlify.app domain. For example Craftnautica.
Preamble
A Svelte + Rollup static site typically serves the static portion from a public/ folder, and generates a production bundle (minified CSS + JS) in a public/build/ folder. It can certainly be configured otherwise, and different frameworks will serve their bundles from dist/ or out/ or similar. This guide is about Svelte because this is what I'm using, but it can just as well apply to any framework that generates a static build.
Connect to GitHub
Click New site from Git, then select GitHub. You can use the same process for GitLab or Bitbucket.
Next you'll be presented with a list of repos that you can deploy, however there's a good chance the repo you want is not in the list.
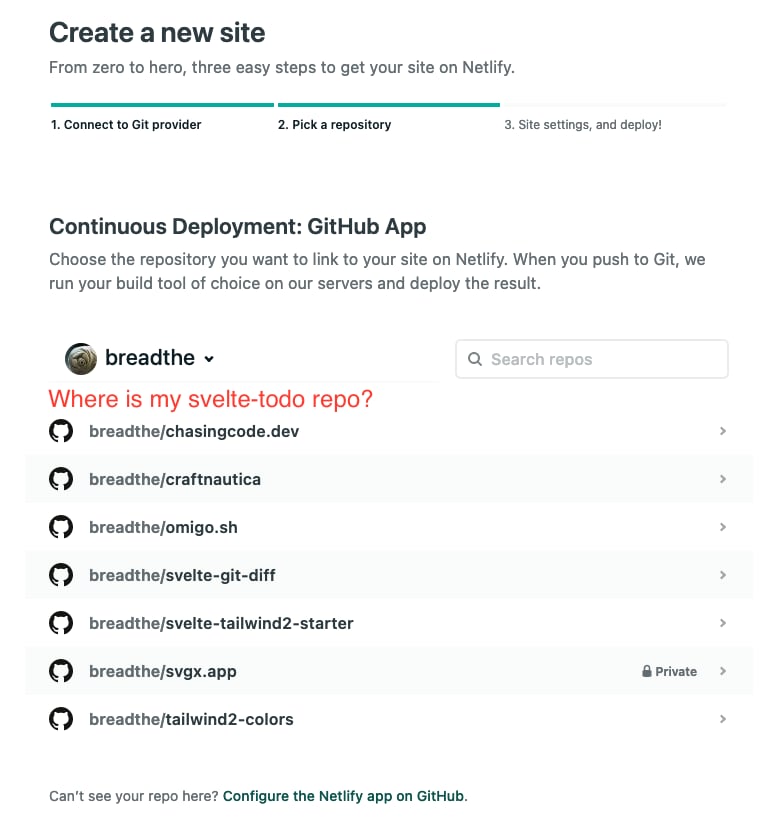
Using the search to filter out the repos will show zero results.
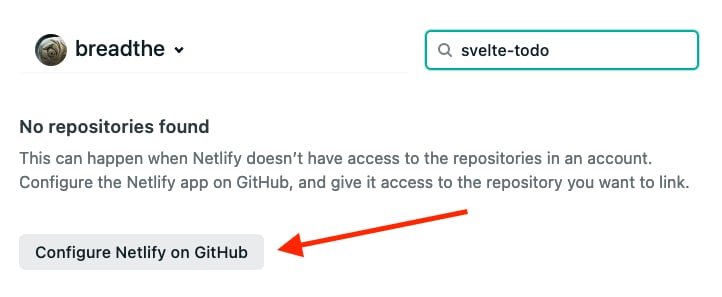
The reason you're not seeing the repo is that it's not yet visible to Netlify. Basically Netlify can't just reach into your GitHub and grab any repo it wants - it requires explicit permission first. The idea is to prevent someone other than the owner from deploying, even if it's a public repo.
So let's give Netlify access to the breadthe/svelte-todo repo by clicking the Configure Netlify on GitHub button, or the Configure the Netlify app on GitHub link.
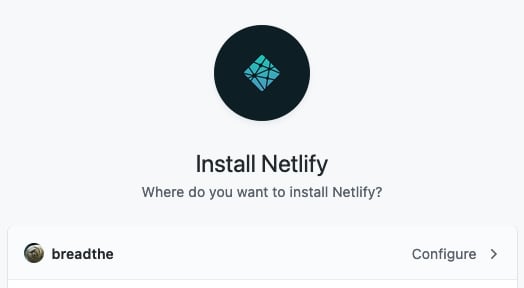
You'll be presented with another window asking which GitHub user to connect. Select Configure. You will need to provide your GitHub credentials next.
After you've logged in, scroll down until you reach Repository access. Making sure Only select repositories is selected, filter the list to find your repo. In my case, that would be svelte-todo.
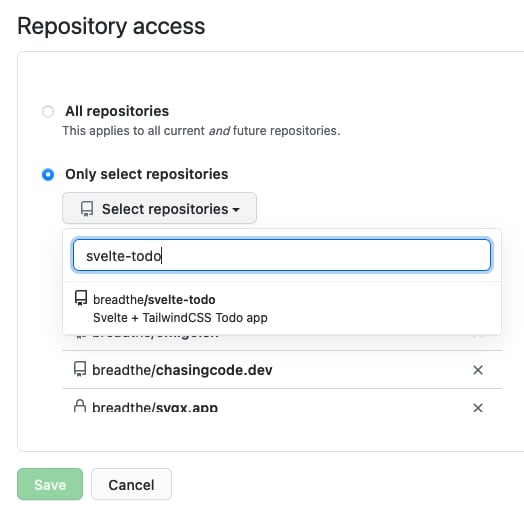
Select it and hit Save. It will take you back to Netlify and the repo will now appear in the list that Netlify can see.
Site settings
Once you've selected the repo, you'll get the deployment settings screen.
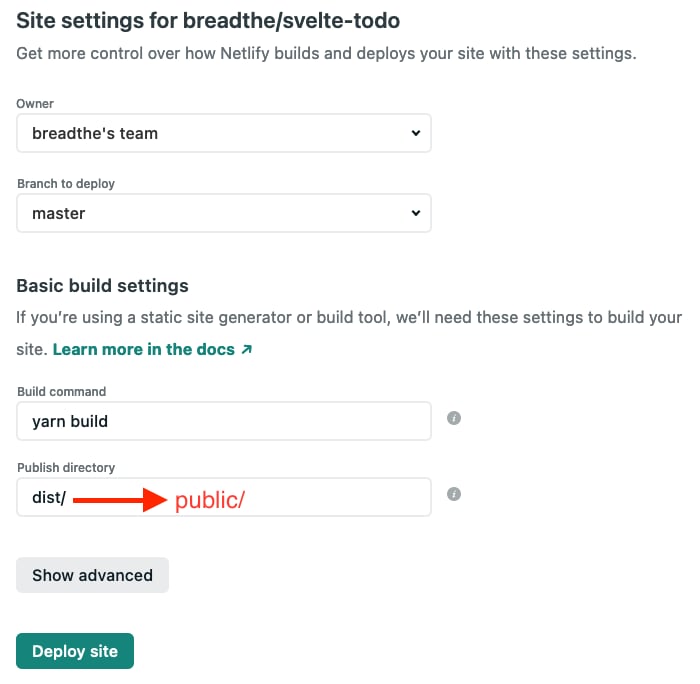
Assuming you want to deploy the master branch of your repo, as in my case, keep the defaults.
Pay attention to the Build command (the npm / yarn command that generates the production build, defined in package.json). Here, it is yarn build, which is what I want, so I'll keep it.
The Publish directory default is dist/, however, and this does not match my Svelte project structure. What I want here is public/ instead, so I'll change that.
Finally, click Deploy site.
Deployment in progress
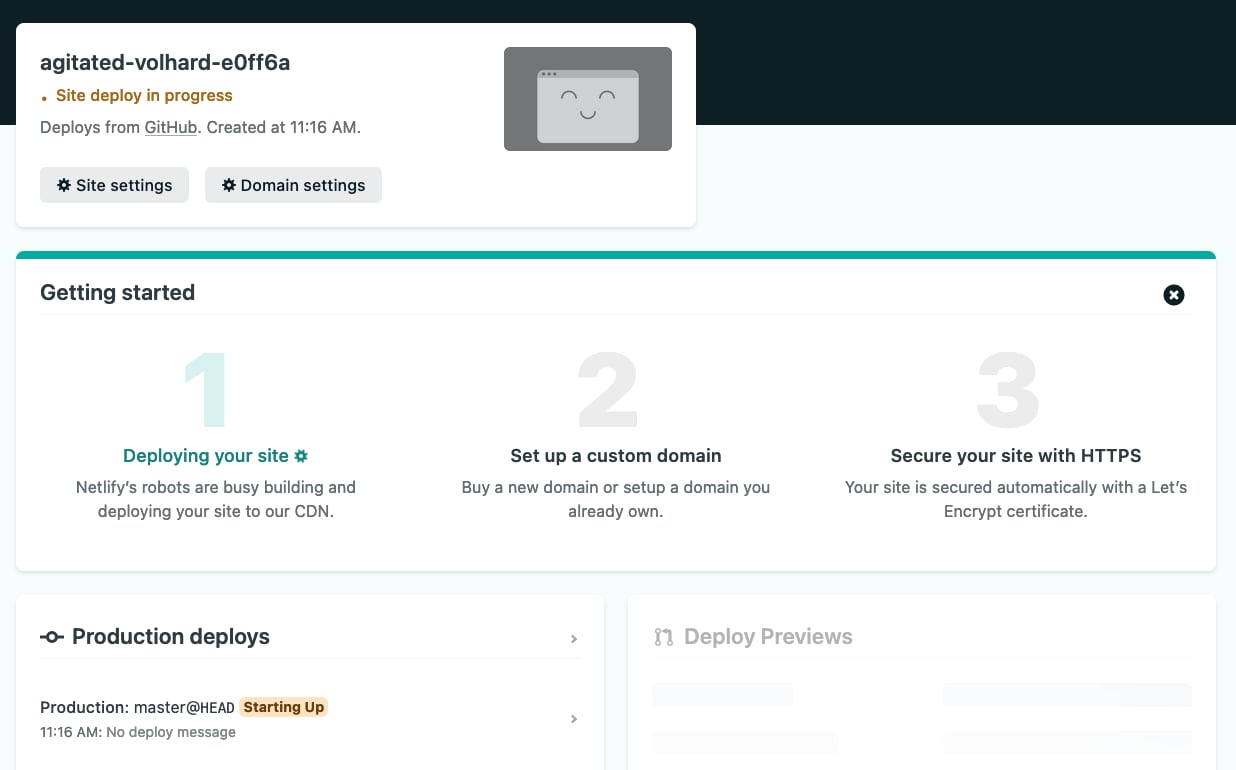
Netlify will take a few minutes to deploy the site. Notice the agitated-volhard-e0ff6a identifier. This is the random sub-domain assigned to the new site. Once deployed, the site can be accessed from agitated-volhard-e0ff6a.netlify.app. That's ugly, of course, so unless it's a throwaway site, I'll show you how to change it in the next step.
Custom domain
Now that the deployment is complete, we can change the domain name by clicking Set up a custom domain
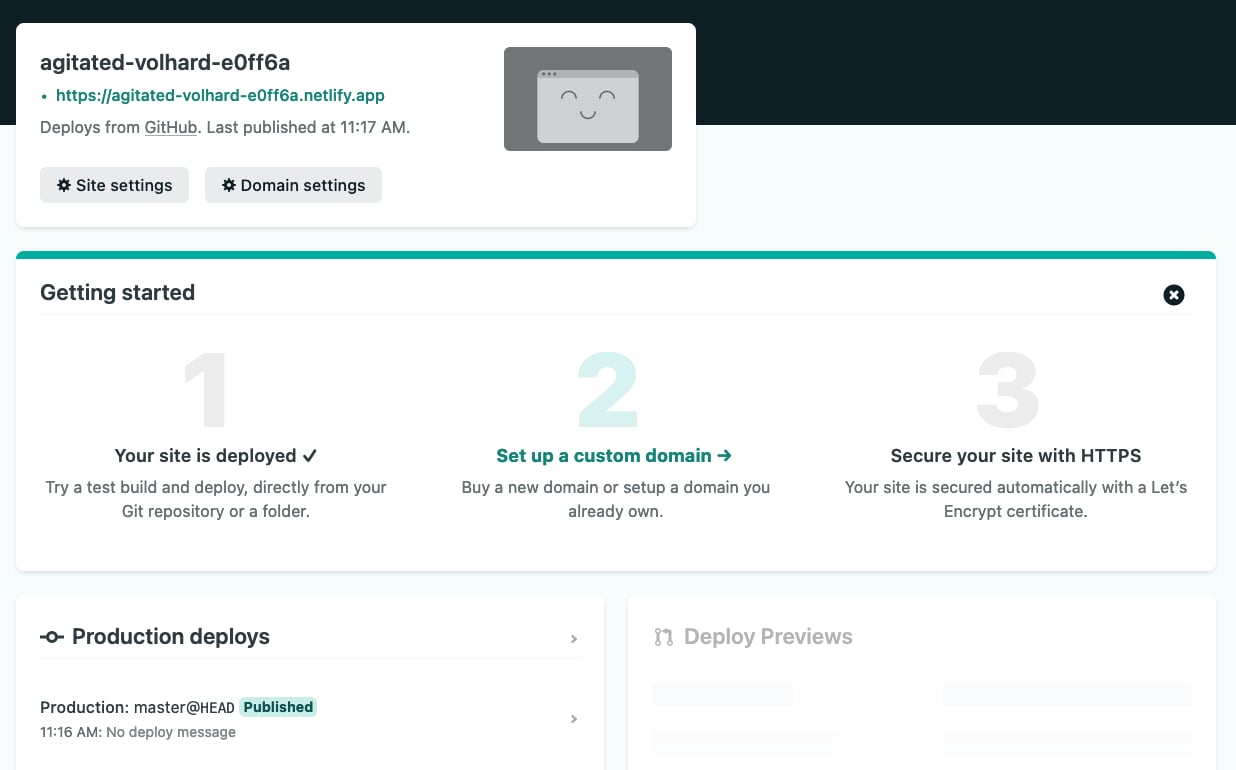
While you can absolutely use your own domain (for free) if you wish, for simple side projects I like to go with Netlify's domain, and choose a custom sub-domain.
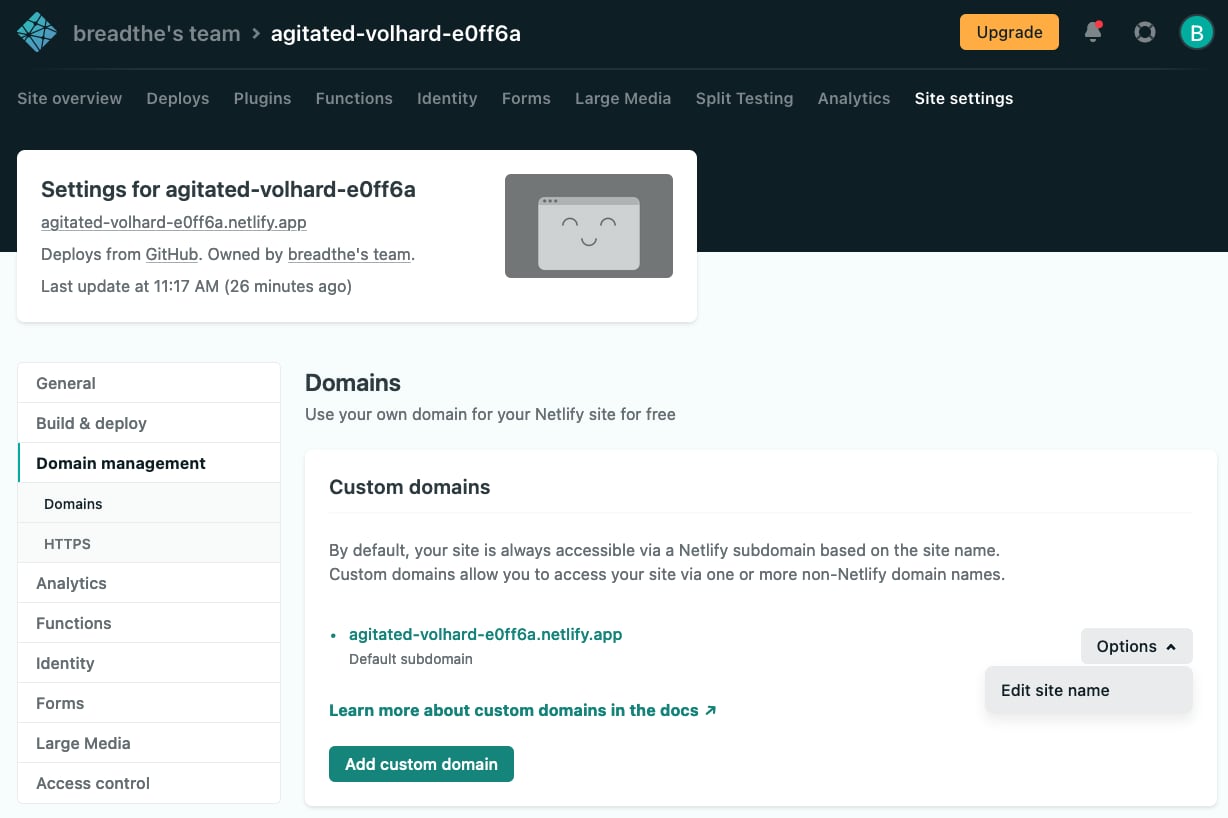
To change the random subdomain from agitated-volhard-e0ff6a.netlify.app to something more palatable, go to Site settings > Domain management > Custom domains > Options > Edit site name.
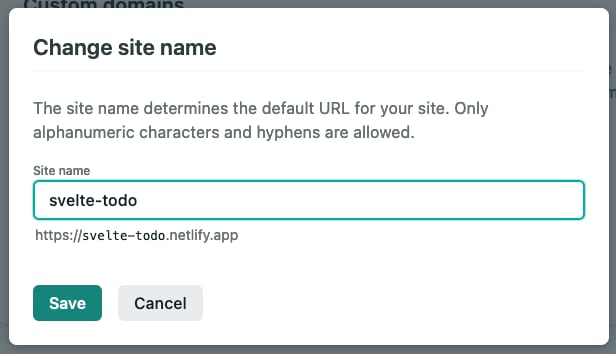
Well, turns out "svelte-todo" wasn't available, so I picked "svelte-todo3". Now I can serve my site from svelte-todo3.netlify.app, but since I created it just for this guide, I'll delete it, and it won't be accessible anymore, freeing the svelte-todo3 subdomain for reuse.
Deploying changes
Netlify has a variety of deployment options under Site settings > Continuous Deployment, but depending on the size of your team and project, a complex workflow might not be needed.
By default, Netlify will deploy any changes that were pushed to the master (older) or main (more recently) branch. If you're like me, hosting simple static sites in a team of one, this setup is just right.
Conclusion
It's fairly straightforward to deploy static content to Netlify. Svelte apps require a single tweak to get Netlify to serve them correctly. If you need more control over deployments or domains, it's there too.